Steps You Should Take When Creating A Prototype
5 Mins Read
Published on: 01 August 2022
Last Updated on: 24 September 2024

Every great business idea has to start somewhere, and yours should always begin with a solid prototype.
A prototype is a model recreation of the product you intend to sell to the consumer. They are designed to the exact specifications of your initial idea to see if the product will function as intended.
Unfortunately, you can’t just dive straight into making a fully-fledged prototype. It is a step-by-step process that requires trial and error. Let’s go through this process so that you know exactly what you should be doing when creating your prototype.
4 Prime Steps To Maintain While Creating A Prototype

Step 1: Idea Stage
You will have started thinking about prototypes because you have a solid idea to sell to the public.
Your first idea may be great, but there are always improvements that you can make. That is the point of the prototype process. You should constantly test your initial design ideas until you have improved every aspect. Only then can you start to think about bringing your product to a design team.
Step 2: Design Stage
The design stage takes your original idea and tries to bring it into the real world in a cost-effective and safe way. Therefore, you will need to meet with a team of engineers or graphic designers who can help you pick out reliable materials and make adjustments to make your product a reality.
Again, this is another trial-and-error stage, and your idea goes back to the idea stage a few times before you get a final product that you can be happy with and sell on the market.
Only once you have created a solid design can you think about making it in the physical world.
Step 3: Building Stage
Building a prototype is more complicated than it may appear, mainly if your idea includes electrical components. The point of the building stage is to create the first example of what you wish to sell.
It is always best to outsource this work to a company like BitBox, and these professionals can work diligently to bring your design specifications to life.
Step 4: Adjustment Stage
The adjustment stage is the most essential part of building a prototype. Now that you have a physical representation of your idea, you should be able to test it in a natural environment.
If your design stage is successful, your prototype should have no issues. Unfortunately, you may need to re-tool any kinks you discovered during the testing stage.
There is no reason to worry, though. That is precisely why you create a prototype in the first place. Keep adjusting and re-tooling until your prototype is functional.
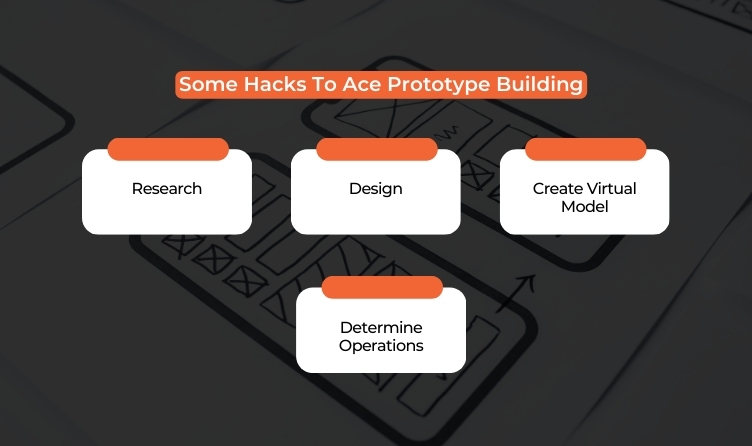
Some Hacks To Ace Prototype Building

Creating a prototype is a challenging road ahead. One needs to know several nuances to develop a prototype effectively.
This section is not a guide. However, it lists all the steps and hacks you can do to streamline the prototype-building process. Here are some of the most prominent hacks that will help you understand ‘how to make a prototype.’
Here we go!
1. Research:
One of the foremost things that you need to do is to conduct extensive research. It would help if you remembered that your product needs to stand out from the competitors.
Therefore, the foremost thing that you need to do is to conduct extensive research on the market. Try to look for that element that needs to be added to your product. This would enable you to cater to your audience or buyers effectively.
This would also help you to form a functional product that remains evergreen, which can even transcend the market and become a novelty item that more and more people buy for the sake of possessing it.
2. Design:
Once you are done researching the product, you are ready to graduate to the second step. This step is the designing step. This step determines the designing part of the whole deal.
These sketches are meant to give a deeper look into the idea. Sketches are critical and represent initial product details. These prototypes are generally not showcased to the public. Instead, these sketches are meant for the eyes of stockholder panels.
Later, the sketch is transformed into a physical model. This is usually common in the automobile industry. The sketch helps the artist to realize their idea in the flesh.
3. Create Virtual Model:
The third step is to create a virtual model. Earlier, companies used to make models using clay. However, nowadays, companies have shifted to virtual models.
Companies have started using 3D modeling systems in order to create models of the prototype. 3D models are true to life and are convenient to a great extent. In other words, they are easy to carry and share.
Therefore, 3D modeling is the most essential part of the prototype-building process. Therefore, 3D models are the best way to see designs in 3D and have higher levels of accuracy.
4. Determine Operations:
Once you are mostly done with all of the aforementioned steps, you need to start determining operations. Operation al organization is a task for the later stages of the building process.
However, this is a crucial process. Therefore, you must keep this step from slipping. The best way to proceed is to define roles and departments. Some of the primary departments include marketing, manufacturing, and sales.
All of these departments are important for the dissemination of a product. Therefore, skipping any one of these departments can lead to losses. As a result, you need to be clear about the operational structure as soon as the 3D modeling stage is done.
And It’s A Wrap!
Prototypes are essential in the world of business as they can help you turn your initial idea into a reality.
You may have to make a few changes to the core concept during this process, but you will have something solid to sell by the end.
If you like this blog, then leave a comment and keep following our page for more such content.
Additionals:


Comments Are Closed For This Article